
How to build a website with AI — step by step
From a plain-language prompt to a published website with tests and quality checks — here is the whole flow, with real screenshots, in one afternoon.
Building a website with AI has moved past the party-trick stage. The interesting question is no longer "can AI produce a page?" but "can it produce a site I would actually put my name on — with a working backend, checks I can trust, and a real domain?" This walkthrough shows the full path in XAIO, from the first sentence you type to the moment your site is live.
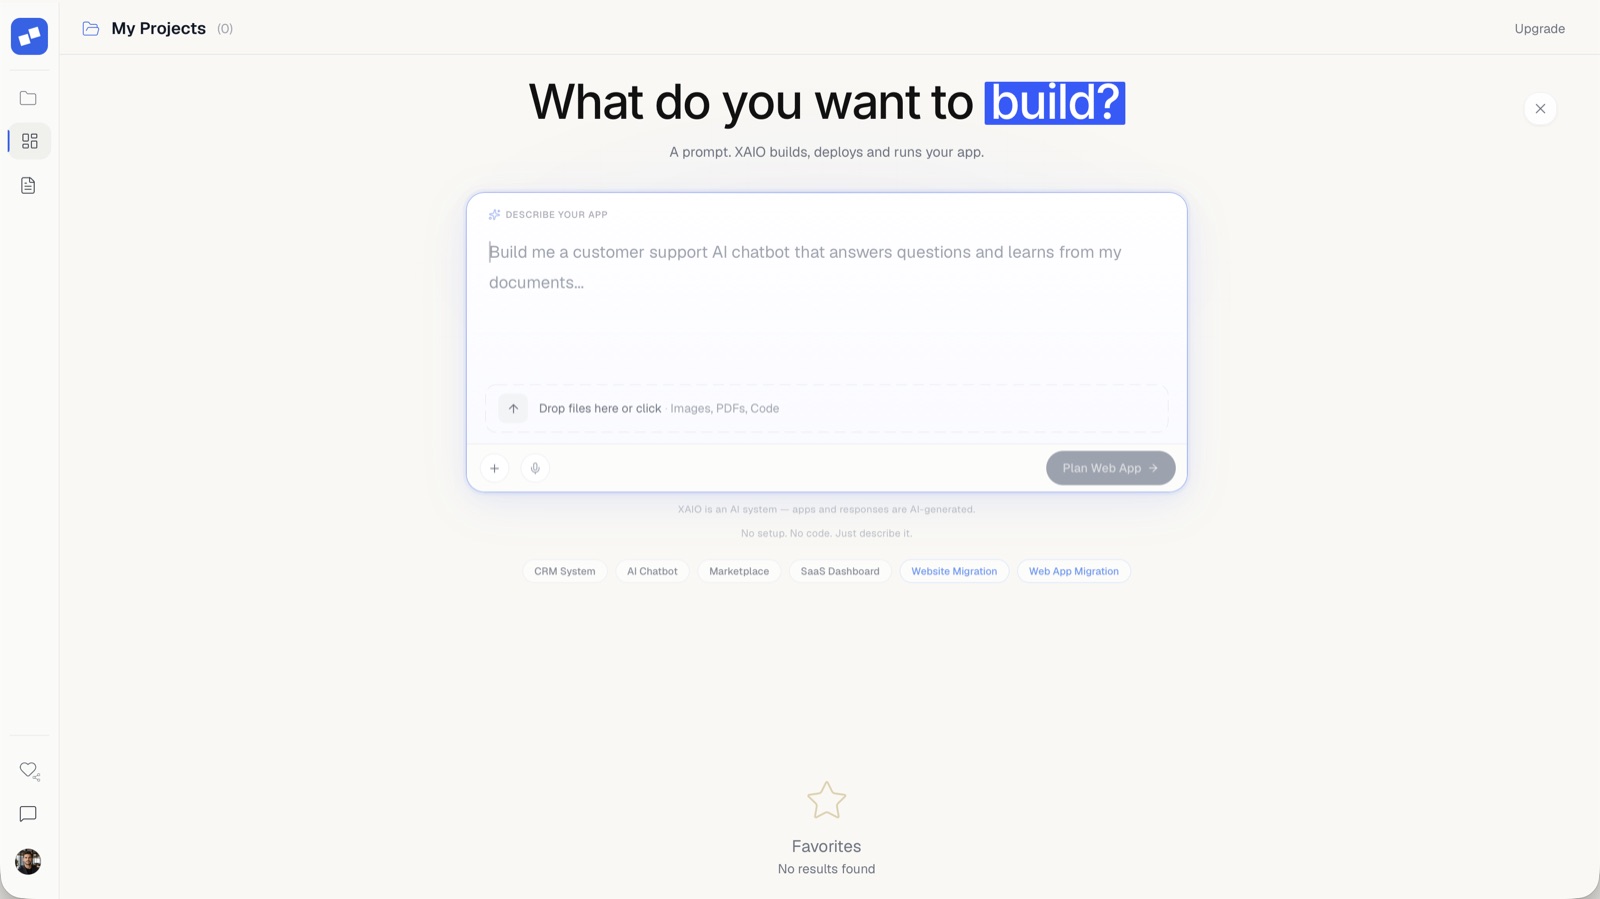
Step 1 — Describe what you want
Start with a prompt in plain language: what the site is for, who visits it, what it should do. You can attach whatever you already have — a logo, screenshots of a design you like, a PDF with requirements. There is no setup and nothing to configure first.
Be concrete about outcomes rather than technology. "A site for a wholesale supplier where customers log in and see their account history" beats "a modern responsive website". XAIO plans the architecture from your intent.
Step 2 — Let XAIO build (and check its own work)
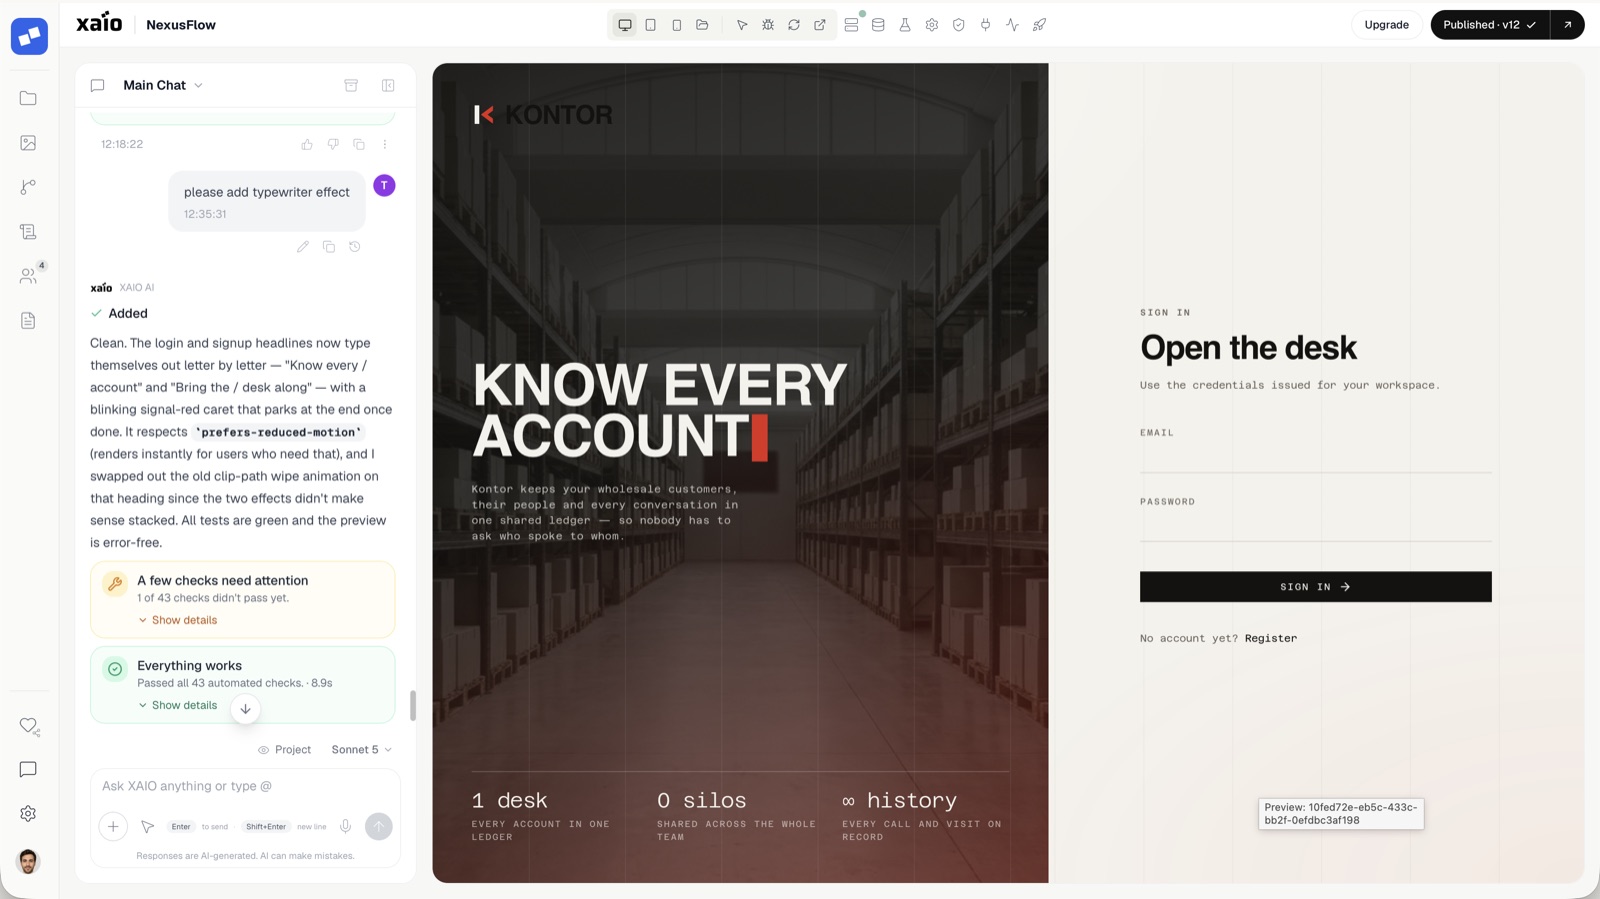
XAIO generates the site as one consistent system — pages, styling, backend logic and database where needed, plus tests. While it works, build errors are caught and repaired automatically, so you are not debugging half-finished output.
Every change then runs through automated checks. In the screenshot below, a small copy change triggered 43 checks before it was accepted. You continue refining in the chat: "add a typewriter effect to the headline", "make the tone more formal", "add a pricing section".
Step 3 — Make it yours in design mode
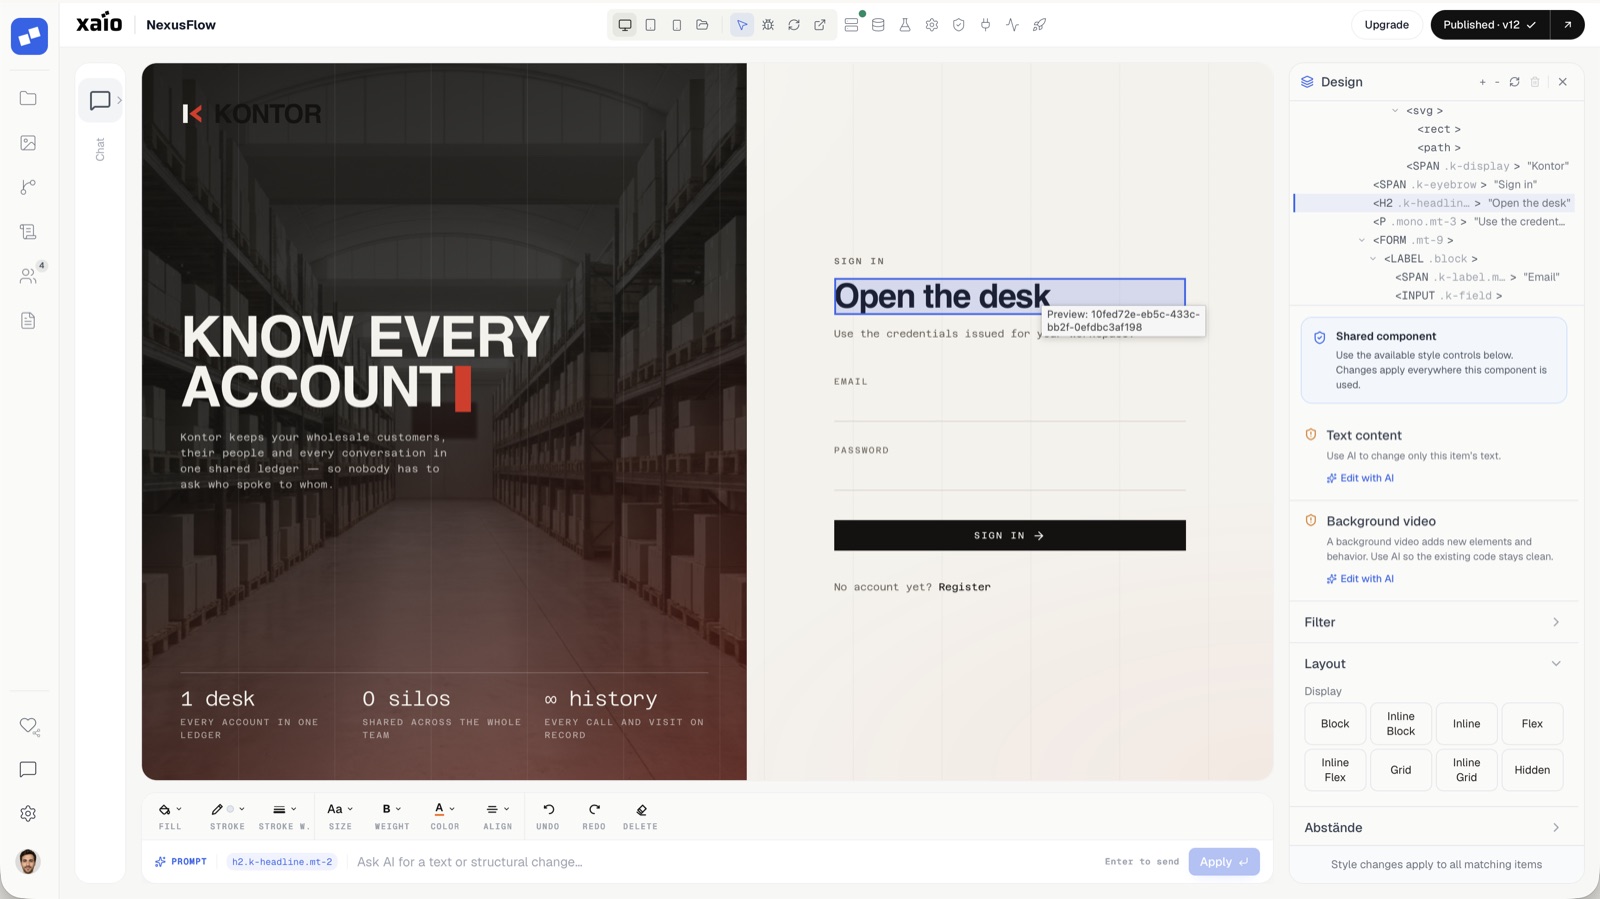
For visual fine-tuning you do not have to describe everything in words. Design mode lets you click any element in the real, running site and change text, colors, spacing or layout directly — or ask the AI for a targeted change on exactly that element. Edits to shared components apply everywhere they are used.
Step 4 — Publish, through the quality gates
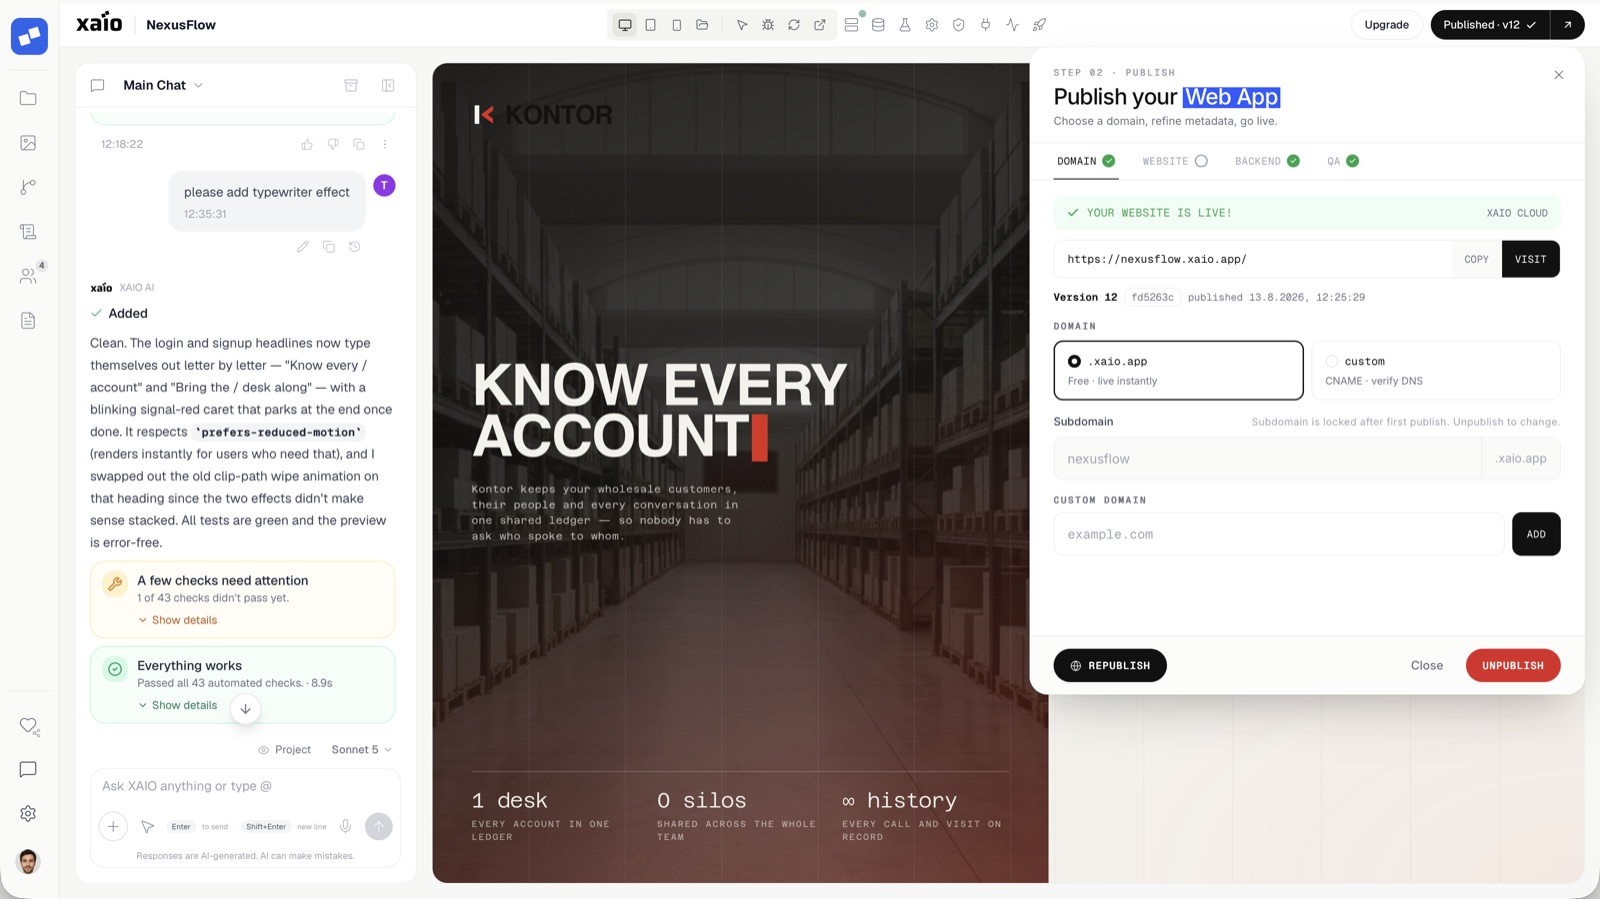
One click starts the publish — but nothing goes live until the gates pass. First, your generated test suite runs against a frozen snapshot of exactly the code that ships, with its own fresh test database, so changes you make in the meantime cannot skew the result. Then the automated security and code-quality review checks the release: vulnerabilities, exposed secrets, risky dependencies. A failing gate blocks the publish — and most findings come with a one-click AI fix that repairs the issue and re-runs the checks.
Only when domain, website build, backend and QA are all green does the site go live — instantly on a free .xaio.app subdomain, or on your own custom domain. Every publish gets a version number, and you can republish or roll back at any time.
What you end up with
That is the difference between generating a page and shipping a website. If you want the deeper technical view, read how the code generation and the release gate work — or just try the flow yourself.
- A live website on your domain — published with tests and a security and quality check behind it.
- Real, exportable code (React, and FastAPI plus PostgreSQL when your site needs a backend) — push it to GitHub or self-host it.
- A workspace where every future change goes through the same checks as the first build.